Examples And Tips For Using Illustrator’s Warp Tools
Adobe Illustrator is one very useful program for creating vector artwork. The tools and features available in Illustrator make it easy to create digital illustrations, whether from scratch or by tracing a photograph.
But this is not all Illustrator can do. Businesses can create impressive graphs using Illustrator’s Graph tools. Marketers can use the impressive Type tool and other type features to design single-page ads. Designers create logos and other marketing graphics that need to be scalable in Illustrator. In short, Illustrator is a comprehensive vector program that is difficult to master.
The aim of this article is to provide one more resource for those of you yearning to learn more about Illustrator. We’ll look at one of the less-mentioned features: the Warp tools, also known as the ‘Liquify tools’.
For you Photoshop gurus, these are similar to Photoshop’s Liquify tool, except that the Liquify effects seen in Photoshop are broken down in Illustrator into seven different tools: Warp, Twirl, Pucker, Bloat, Scallop, *Crystallize *and Wrinkle. These seven tools are all a part of Illustrator’s Liquify package.
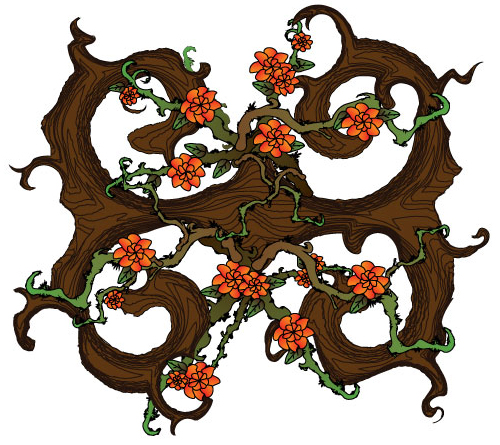
At first glance, some of these tools may look the same, but each has a special effect. And we’ll explore the various effects by creating an ornamental illustration involving branches, vines and flowers. You’ll be able to save and add each of the design elements to your collection of Illustrator symbols as well.
So, open up Illustrator, and get ready to dive into a learning experience that is sure to improve your logos, illustrations, posters and more.
Accessing The Tools
In versions CS to CS4, the Liquify tools are located in the toolbar directly below the Rotate tool and above the Live Paint Bucket tool. In Illustrator CS5, the Warp tools are in the same location but now underneath the new Width tool.
Simply click and hold the Width tool to view a pop-out menu of the seven Liquify tools. Then release your mouse over the tool you want to use. Or simply use the keyboard shortcut Shift + R to access the basic Warp tool.
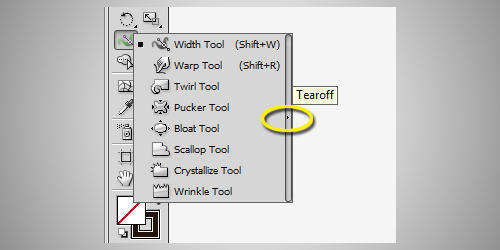
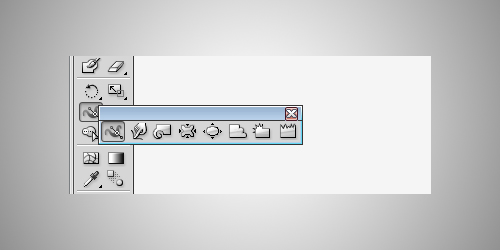
To keep the Warp tools handy, click on the “Tearoff” arrow to the right of the pop-out box. This will detach the tools from the toolbar so that you can access them much more easily while working.
Basic Use
Before diving into a design project, you will need to know some of the usability features of the Liquify tools. For instance, all of the tools can be used to warp an object inward or outward, as shown in the image below (created using the Bloat tool). When creating an inward warp, you need to start with the crosshairs outside of the path. The opposite goes for an outward warp: keep the crosshairs inside of the path.
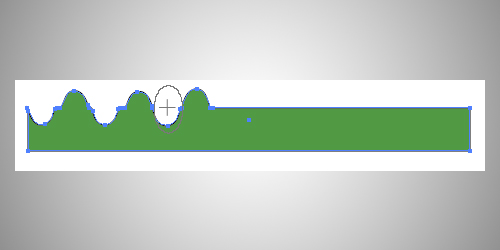
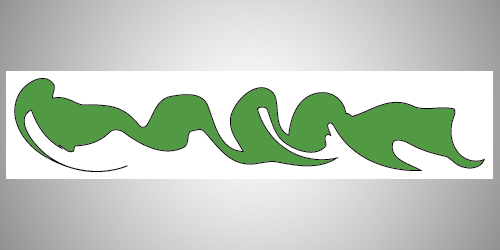
When using the tools, simply click once to reshape the image, as done with the Bloat tool above (this feature does not work with the basic Warp tool). Or drag the tool across the image for a more dramatic effect, as in the following example, done with the Twirl tool:
For better results along paths, make sure that the crosshair icon in the center of your brush is on the path that you want to reshape when clicking on the object. This will ensure that the brush selects the actual path, rather than having more of a pushing effect against the path.
To open the “Options” box and change the settings for a Warp tool at any time, simply double-click the tool’s icon:
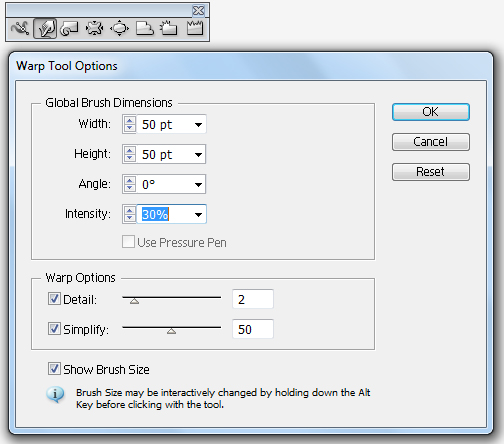
All of the tools have the same basic brush dimension options, which include width, height, angle and intensity. Basically, the width and height options change the shape of the brush; although, a quicker way to adjust the brush’s shape is to hold down Option/Alt while dragging the mouse across the screen. (And hold down Shift + Option/Alt to keep the dimensions of the brush proportional.)
The angle option adjusts the angle of the brush. For instance, if your brush is an oval shape, it would be angled to the left at 120° and to the right at -120°.
The intensity option, of course, adjusts how much of a change each stroke makes. If you want more control, select a lower number. If you want a dramatic change, select a higher number. If you are using a pressure-sensitive tablet device, the “Pressure Pen” option lets you control the intensity with the pressure of your pen on the tablet.
The lower half of the “Options” box contains adjustments specific to the reshaping brush you have selected. Many of the tools include “Detail” and “Simplify,” but the Twirl, Pucker, Crystallize and Wrinkle tools include several other options as well, covered in more detail later. Keep in mind that the best way to learn each Warp tool is to play around with the options yourself.
Using Warp, Twirl And Wrinkle To Create Vines
The Warp, Twirl and Wrinkle tools do an amazing job of creating wood grain and branch or vine shapes. The easiest way to do this is to create a brown rectangle and then fill it with lines. You can either use the Line Segment tool to create and duplicate line patterns in a slightly darker brown than the rectangle background, or follow the easy tutorial on creating a wood grain texture from VecTips.
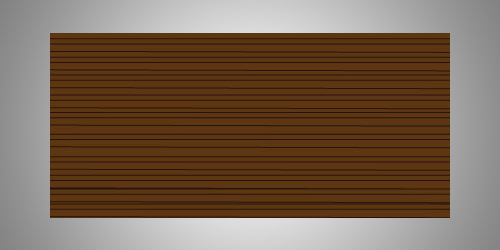
Double-click on the Warp tool and change the width to 50 points, the height to 50 points and the intensity to 30%. This is the basic and most well-known of the Liquify tools, but maybe only because it is first in the menu. With this tool, you have to move the mouse to make changes; simply clicking in one spot does not reshape an object.
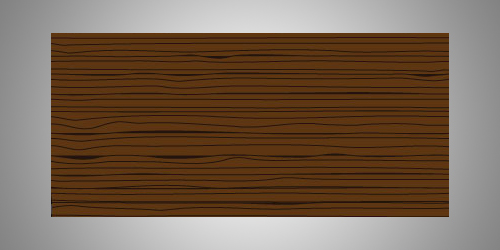
To get a glimpse of how this particular tool works, drag the Warp tool across the top of the rectangle, while ever so slightly shaking it up and down. The Warp tools tend to distort if used too much, so if you do not like the effect created, hit Ctrl + Z to erase moves and try again. Keep sweeping the Warp tool across the rectangle in small sections until you have created lines that look like wood grain:
Tip: If you followed the technique of creating individual lines, go to Object → Path → Join before moving on to the next step.
Now for the fun part: creating a vine to save as a symbol. Double-click on the Twirl tool to see its settings. In addition to the settings for the regular Warp tool, you will notice a “Twirl Rate” option. This affect how fast or slow, as well as which direction, the tool turns in a circular motion. A negative number will twirl the tool clockwise; a positive number will turn it counter-clockwise.
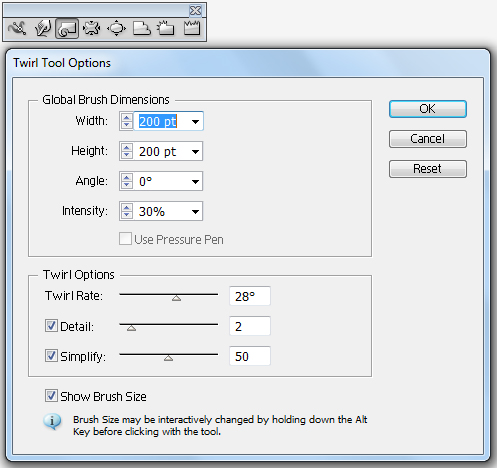
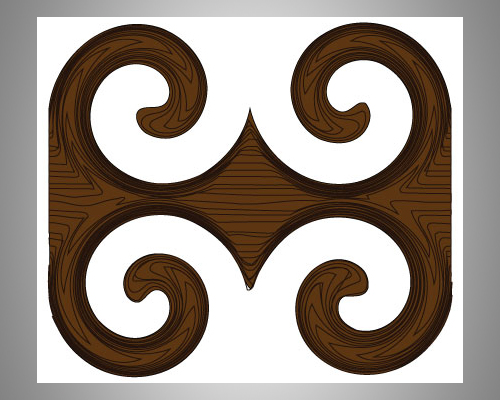
Use the settings in the image above, and then click on each corner of the rectangle. Make sure the crosshairs stay on the outside of the rectangle. The Twirl Rate is set to make the tool turn counterclockwise; but rather than opening up “Options” every time you need to change the direction, use the hot key: Option/Alt. Make sure, though, to click first and then hit the hot key, or else Illustrator will think that you are trying to change the brush size rather than the direction of the twirl.
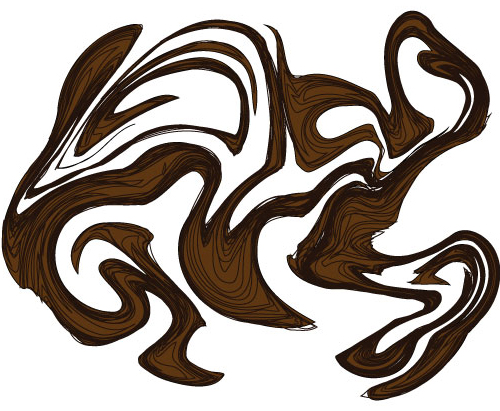
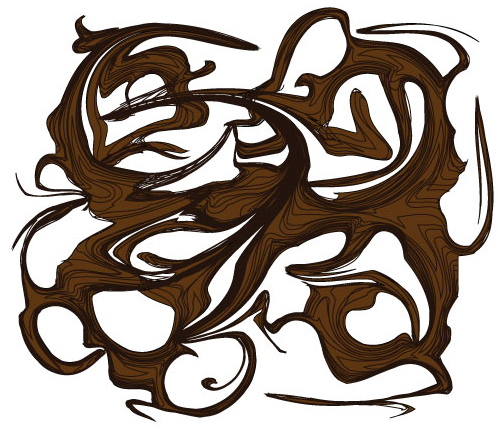
The best part of the Twirl tool is its ability to produce many unique shapes. If you want, you could go crazy twirling the tool across the entire page. Create something like the graphic below by changing the intensity to 50% and the twirl rate to 50. Then start in the upper-left corner of the wood, and drag the tool up and down the graphic; then swipe it once briefly horizontally across the center. Results will vary depending on your motions.
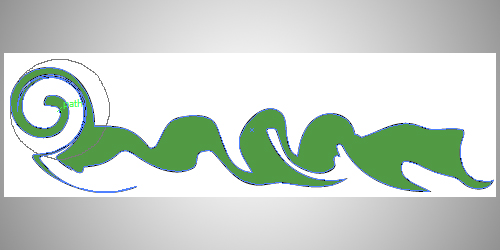
Or you could be more controlled with your movements using Twirl and create vine-like branches, like the ones below. To get a similar look, use the same settings that you used to create the four twirled corners of the wood piece; only make the brush smaller by holding Shift + Option/Alt and clicking and dragging your mouse across the screen. Change the size to create different-sized branches. Now click along the edges wherever you think a small branch should be. Remember to hit Option/Alt after clicking the mouse to change the direction of the twirl.
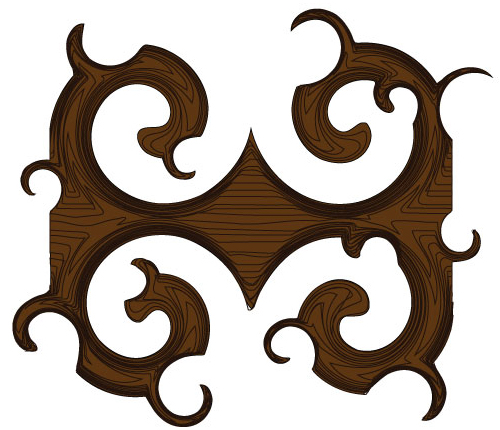
Vines are not perfectly circular, though, so add some character to each one by clicking it with the Twirl tool, again changing the brush size as needed.
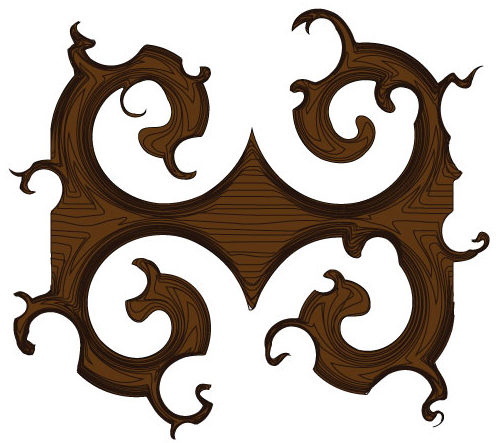
The Warp tool is excellent for molding shapes, which is exactly what this ornamental branch needs at this stage of the process. Double-click on the Warp tool, and change the width and height to 50 points and the intensity to 50%. Then, start pushing the brush against any sharp or straight edges. You can also pull out some of the edges or pull on a few twirled vines.
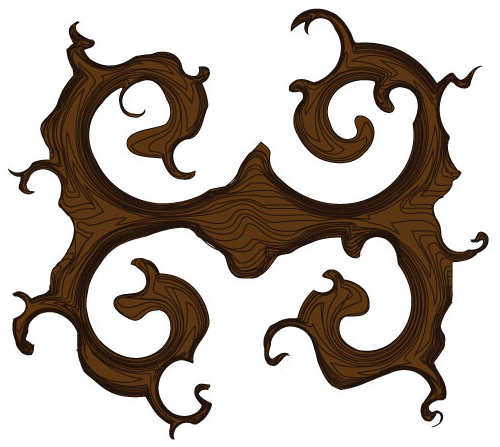
You may want to play around with the Warp tool to see just how far you can stretch graphics. Change the intensity to 100%, and start stretching and pulling on branches. You may get something like the following:
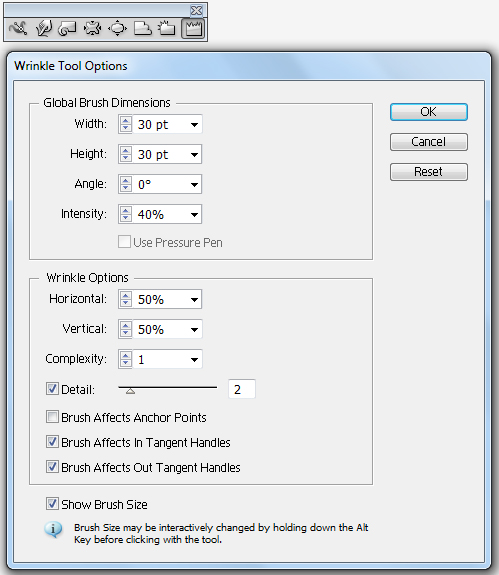
Now double-click on the Wrinkle tool. You’ll notice that this tool comes with extra settings. The “Horizontal” and “Vertical” settings control the direction of the wrinkles. When working on a complex image with multiple anchor points, you may want to select “Brush Affects In/Out Tangent Handles,” rather than “Brush Affects Anchor Points,” to limit the effects of the tool. To add a slight texture to the smooth parts of the ornamental wood design, use the following settings:
The longer you hold the Wrinkle tool, the more it will wrinkle the image. You can create something like the following texture by dragging the tool across the smoother sections of the graphic, making sure the crosshairs of the cursor are close to the edges to be wrinkled.
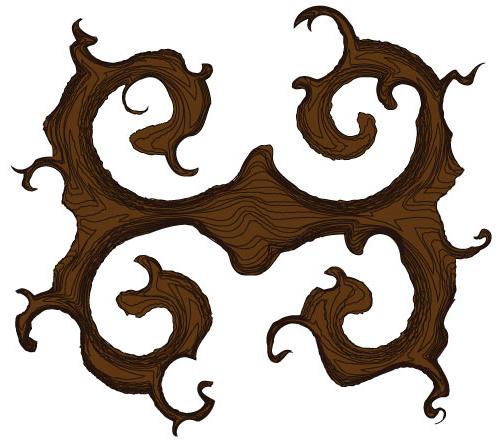
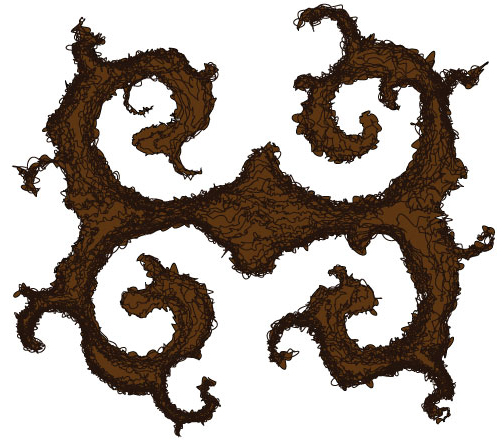
You may notice that the Wrinkle tool works almost like sound waves and creates some really interesting effects. Change the intensity to 100%, and drag the tool across the entire design. Now your branches will look almost mossy, or at least tangled with vines.
Using Pucker, Scallop And Warp To Create Flowers
Here’s one easy way to create flowers. Start by creating an oval shape and filling it with a gradient. Then double-click on the Pucker tool, and change the intensity to 50%. Make the size slightly larger than the width of your oval but not as high. Then click and hold over the center of the oval until the sides come together in the middle.
If the brush is higher than the oval, then the entire shape will disappear because the Pucker tool draws points on a path together. Just as when you draw fabric together, however, the Pucker tool does not delete points of a path but simply gathers them together, shrinking the total area:
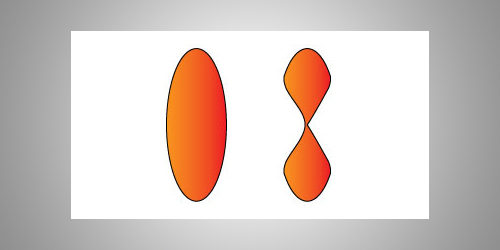
Now right-click on the puckered oval, go to Transform → Rotate, enter 90°, and hit “Copy.” Place this rotated copy over the first petal. With this petal selected, go to Transform → Rotate again, enter 45°, and hit “Copy.” Select this last petal, go to Transform → Rotate, and create a 90° copy. Now select the entire flower, right-click, and select “Group.” Right-click again, and select Transform → Scale. Set “Uniform Scale” to 50%, and hit “Copy.” Place this copy over the center of the larger flower, and “Group” the entire image again.
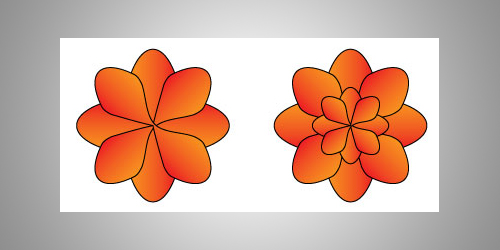
Select the Warp tool, and using an intensity of 30% and an appropriate size, sweep it across the petals to create a wilted look. If the center of the flower looks loose, then use the Scallop tool at an intensity of 30% or less and click once on the center. Make sure the size is no larger than the center petals. Create a few variations:
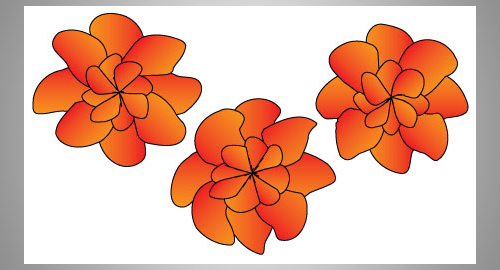
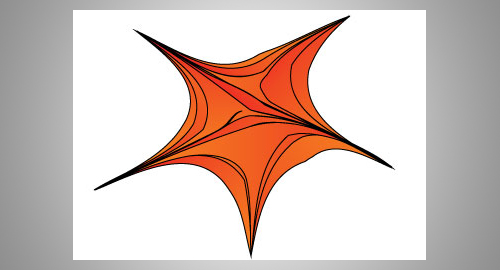
You may want to play around with the Pucker and Scallop tools to see the different effects they create. As mentioned, Pucker draws points together, and it will do so even when you are dragging the brush across an image. Below, the brush was dragged outward on five different sections of the flower, using an intensity of 100%.
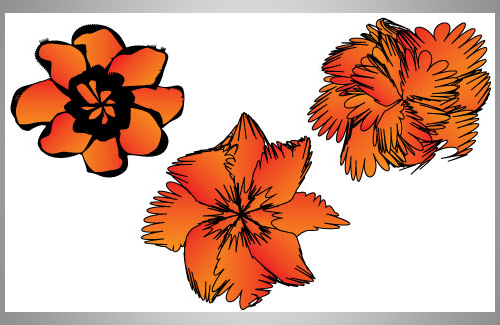
The Scallop tool can create quite a variety of designs with its multiple settings. Keep in mind, though, that the higher the number for “Complexity” and “Detail,” the more the effect will just look like thick black strokes. The first flower below was created using a complexity of 5, detail of 10 and intensity of 30%. The second flower has a complexity and detail of 2 and an intensity of 30%; the scallops are much more noticeable. Increase the intensity to 100% and drag the brush counter-clockwise on the flower to create an image like the third flower below.
Using Bloat And Crystallize To Create Mossy Vines
The Bloat tool is similar to Warp in that it can be used to shape objects, except that it “bloats” outward or inward, almost as if someone put a magnifying glass up to the object and captured the resulting image.
Before selecting Bloat, draw a long rectangle, and fill it with a brown and green gradient. Double-click on the Bloat tool, and change the intensity to 50%. Click “OK,” and hold Shift + Option/Alt to give the tool about the same circumference as the width of the rectangle. Begin bloating the rectangle into a vine shape. You may want to start at each end first:
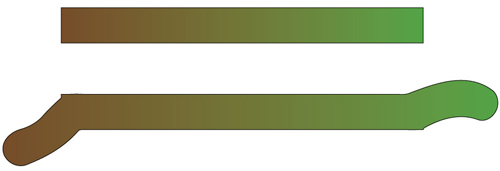
Continue shaping the vine with Bloat. Try long strokes across the length of the vine, both above and underneath. To create thinner lines, place the crosshairs of the brush outside of the paths to push against the shape. To make parts of the vine thicker, place the crosshairs on the inside of the image.

Further shape the vine with the Bloat tool, adding stubs by using a smaller brush size and dragging sections of the vine outward. You may want to change the intensity to 100% to create more dramatic strokes. Change the size of the brush as needed.

Although quite similar to the Scallop tool, the Crystallize tool is unique in that it creates more of a starburst effect, almost as if groups of crystals were bursting out of the image. You can use this effect to create fur for animal illustrations or to draw fungus (as you will be doing next).
Double-click on the Crystallize tool, and change the intensity to 100%. Click carefully on different areas of the inside of the vine, changing the size of the brush to create different looks. Notice the difference in effect from placing the brush closer or farther away from the edges. Remember to hit Ctrl + Z to erase brush strokes if needed. You can also click a few times on the outside of the vine using a smaller brush size to create more of a spiked effect:

Now change the intensity to 50%, and click on some of the “crystals” to grow more interesting fungus shapes. Try some clicking and dragging to elongate the crystals.

Create different vine shapes, add a few leaves, and then scale, rotate and reflect each piece. Put them all together to create your unique vine illustration, made using the entire Liquify tools collection.
In Conclusion
The Liquify tools in Adobe Illustrator are a hidden gem of sorts. Not many tips for them are available online, yet each tool can produce a unique warp effect, and all are exceedingly useful for various projects. Just remember that, as with most other tools, the best way to learn the Warp tools is to use them over and over and over. Play around with the settings for each one to see what amazing designs this incredible set of tools is really capable of. Then share what you have learned, or display your art for the online design community to enjoy!
Further Reading
- How To Create A Water Lily In Illustrator
- 40 Excellent Adobe Illustrator Tutorials
- 10 Useful Typography Tips For Adobe Illustrator
- Inspiring Illustrator Artworks By Artists Around The World


 See the full picture →


 SurveyJS: White-Label Survey Solution for Your JS App
 Celebrating 10 million developers

