Inserting Widgets With Shortcodes
The shortcode ability of WordPress is extremely underrated. It enables the end user to create intricate elements with a few keystrokes while also modularizing editing tasks. In a new theme we’re developing, I decided to look into adding widgets anywhere with shortcodes, and it turns out that it isn’t that difficult.

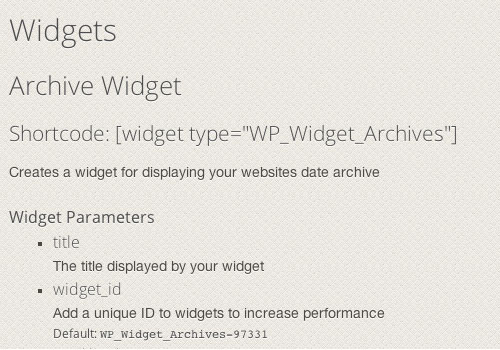
Some of the widgets that can be added with shortcodes.
This tutorial is for experienced WordPress users; we will be looking at the widgets object and shortcodes without delving into too much detail about how and why they work. If you are looking for more information, I suggest reading Mastering WordPress Shortcodes and the Widgets API article in the Codex.
Grabbing A Random Widget
The first thing I looked into was how to output any widget without shortcodes. Once done, implementing a shortcode is a relatively trivial matter. Digging around in the Codex, I found the the_widget() function, which does just what I want.
It takes three parameters:
- The widget’s class name,
- The widget’s instance settings,
- The widget’s sidebar arguments.
Once I saw this, my face lit up. Not only can I output a widget anywhere, but I can pass different sidebar arguments to any widget. This is great because I can specify parameters such as before_widget and after_widget.
This also opens up the possibility of easily changing the style of the widget from within the shortcode, but more on that later.

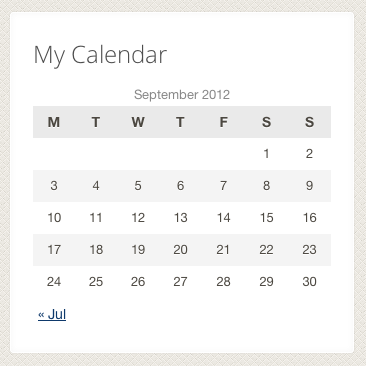
After applying some CSS, the calendar widget can be added anywhere.
Output Buffering
When adding a shortcode, you scan the text for a particular string, do something with it and return the result you want to see. It’s obvious that we will be using the_widget(), but that function only echoes content. To get around this problem we’ll be using output buffering.
Take a look at the following two examples; the result is exactly the same.
the_widget( 'WP_Widget_Archives' );ob_start();
the_widget( 'WP_Widget_Archives' );
$contents = ob_get_clean();
echo $contents;First we start our buffer. From this point on, anything that is echoed goes into our buffer instead of actually being echoed. By using ob_get_clean(), we can pull the contents of the buffer into a variable (and also clear the buffer). Once this is done we can echo that variable, or pass it on by returning it if we’re in a function.
Creating The Shortcode
Now we know everything we need, so let’s create the skeleton of our shortcode. First we need to figure out what arguments we need to pass, and what arguments we want to allow the user to pass via the shortcode tag.
- Widget type – Which widget do we want to show;
- Title – The title of the widget (used in the instance parameter);
- Other instance parameters;
- Other sidebar arguments.
I’ll admit that this is a bit vague. The reason is that each widget will need a separate set of possible arguments due to the varied functionality they have. For an archive widget, we can specify whether or not we want the post count. For a category widget, we could also specify the hierarchical attribute.
Solving this problem requires a flexible shortcode, and good end-user documentation.

The best way to make sure the shortcode is used properly is to provide good documentation.
The Shortcode Skeleton
add_shortcode( 'widget', 'my_widget_shortcode' );
function my_widget_shortcode( $atts ) {

// Configure defaults and extract the attributes into variables
extract( shortcode_atts(
    array(
        'type'  => ’,
        'title' => ’,
    ),
    $atts
));

$args = array(
    'before_widget' => '<div class="box widget">',
    'after_widget'  => '</div>',
    'before_title'  => '<div class="widget-title">',
    'after_title'   => '</div>',
);

ob_start();
the_widget( $type, $atts, $args );
$output = ob_get_clean();

return $output;
There are two common attributes all shortcodes will have. The type is where the user will specify the widget type, and the title is where the user specifies the title (no surprises there).
Once we have our $atts, we figure out the $args — the widget’s sidebar parameters. Since this is a commercial theme, we don’t need to give the user control over these arguments, so they are just hard coded for now.
In the final section we’ll put it all together to create the final widget.
Extending The Shortcode
Once this is done we can get crazy with our shortcode parameters. One example is allowing the user to pick a scheme. For our example, this is dark or light, but you could easily specify an exact color.
All we need to do is add an argument to the shortcode, add a CSS class to our widget based on this argument and let our style sheet do the rest.
add_shortcode( 'widget', 'my_widget_shortcode' );

function my_widget_shortcode( $atts ) {

// Configure defaults and extract the attributes into variables
extract( shortcode_atts(
    array(
        'type'   => ’,
        'title'  => ’,
        'scheme' => 'light'
    ),
    $atts
));

$args = array(
    'before_widget' => '<div class="box widget scheme-' . $scheme . ' ">',
    'after_widget'  => '</div>',
    'before_title'  => '<div class="widget-title">',
    'after_title'   => '</div>',
);

ob_start();
the_widget( $type, $atts, $args );
$output = ob_get_clean();

return $output;
If you need to make this even more flexible, you can allow a background color to be specified, you can add the $args using parameters from the shortcode, and much more.
This solution works perfectly with custom widgets as well. All you need to do is add the class name as the type and accommodate for its specific instance settings
Conclusion
By now you should be on your way to creating wonderful things with this shortcode. It is great for end users and also a very useful tool to test widgets before releasing a theme.
We use this in our themes to make them even more flexible for our users. The ability to put anything anywhere, easily, is one that all themes should have!
Further Reading
- WordPress Shortcodes: A Complete Guide
- Mastering WordPress Shortcodes
- WordPress Functions To Make Blogging Easier


 Register for free to attend Axe-con
 SurveyJS: White-Label Survey Solution for Your JS App
 Register Free Now
 Celebrating 10 million developers


