Controlling The Cache: Using Edge Side Includes In Varnish
I’m a firm believer that the best way to optimize for fast-loading mobile sites is to optimize for everyone. We don’t know when someone is on a non-mobile device but tethered to their phone, or just on awful Wi-Fi.
In a previous article for Smashing Magazine I explained how you can speed up your websites by serving dynamic pages from a reverse proxy like Varnish. If you are new to Varnish then that article is the place to start as I’ll be diving straight into configuration details here.
In this article I’ll explain how you can benefit from using Varnish even when there are parts of your pages that can’t be cached for long periods, using Edge Side Includes.
The Problem With Caching
The bulk of most web pages is content that doesn’t change very often. Generally, when you publish some content it remains fairly static, and even if it is updated, taking a few minutes before the new version appears may not be a problem. If it is vital that the cache is invalidated on publish, you can use cache invalidation to clear that page from the cache. However, there might be some content that you do not want to cache at all, such as personalized content. There may also be content that you would like to cache but for shorter periods of time, perhaps a news widget that updates very frequently. When pages contain this type of content you might think they are uncachable. It is here, though, that Edge Side Includes (ESI) can save the day – and your site performance.
What Are Edge Side Includes?
ESI is a language specification for assembling fragments of web pages inside other web pages. The specification was submitted to the W3C in 2001, but remains a “W3C Note” made available for discussion and not endorsed by the W3C or updated by a Working Group.
ESI works in a similar way to other methods of including fragments in your pages, such as Server Side Includes (SSI) or PHP include statements, but it has been designed for reverse proxies like Varnish that sit in front of a web server and cache content.
How Does ESI Work With Varnish?
Varnish has implemented a subset of ESI features, three of the available seven statements. The supported statements are listed in the Varnish documentation. This means that we can use ESI on our pages and tell Varnish to cache an include for a shorter time than the main document, or even not cache the include at all. If you are already up and running with Varnish, it’s really simple to get going with ESI and make a huge difference to your hit rate: the number of pages served from the cache.
An Example
If you want to follow along and don’t have a Varnish install to play with, you can download my Vagrant package from GitHub which will install a basic LAMP server and Varnish. Have a look at the README on GitHub to see how to configure that for your environment.
I have a layout using an open source Bootstrap template, which is a standard blog layout. In the sidebar I intend to place some content that will be frequently updated and I want to ensure that it is not cached for too long. The blog post and other content I want to be cached for several minutes, as it won’t change often.

Make The Sidebar An Include
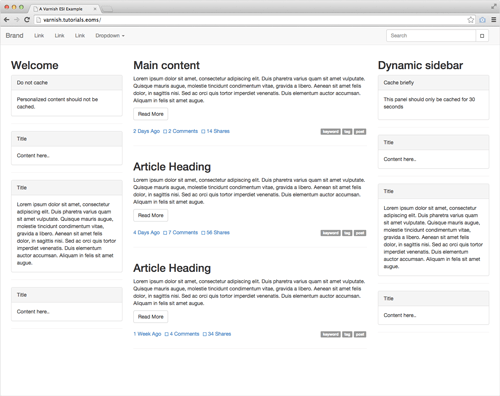
The first thing to do is make the sidebar a PHP include. I save the include as inc/sidebar.php and then add a PHP include to the main page to include it. My page looks the same but the content of the sidebar is now separated into an include.
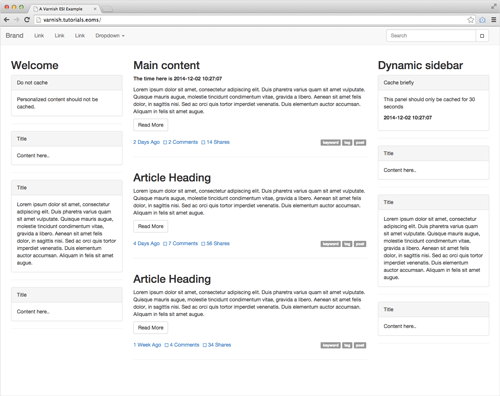
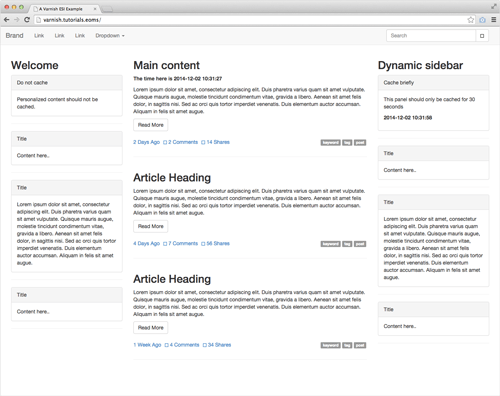
In my main page and in my include I am outputting the current date and time. This just helps me see whether my cache is working. If I was doing no caching, each time I reload the page I would expect the time to change. With Varnish in a default state both times should be the same, and they will update only when the cache clears.

Include The File Using ESI
I’m now going to use two ESI tags that are supported by Varnish:
esi:include
esi:remove
The esi:include tag is used to include the file via ESI. So I replace my PHP include with this:
<esi:include src="inc/sidebar.php"/>Create A Fallback When ESI Are Not Available
Straight after the esi:include tag we add esi:remove tags, and inside those tags is the original PHP include. While testing I have also added the line “Not ESI!” so that I can see if the include is being added by PHP or by ESI.
<esi:include src="inc/sidebar.php"/>
<esi:remove>
  <?php include('inc/sidebar.php'); ?>
  <p>Not ESI!</p>
</esi:remove>
If you now load the page on a server running Varnish that does not have ESI configured you should see the “Not ESI!” text. ESI isn’t running so the original PHP include will be loaded.
The esi:remove tags enable you to create a fallback for situations where Edge Side Includes are not available. This might be because Varnish hasn’t been configured to use them for that page, or you are serving the site directly through Apache, as might be the case in development.
Where ESI are available the entire <esi:remove></esi:remove> block is removed from the page when includes are parsed. The use of the esi:remove statement doesn’t stop the PHP code from being executed. It will still be executed each time the page is loaded if ESI is not available, and according to caching policy if it is.
An alternate option to using esi:remove is to use the third statement supported by Varnish, <!--esi … -->. You would use this if you want nothing to happen when ESI is not available.
<!--esi <esi:include src="inc/sidebar.php"/> -->
In the above case, if ESI were unavailable the sidebar would not be loaded – the browser treats the statement as an HTML comment – so nothing would be visible to a site visitor. If processed by ESI, the comments would be removed and the include parsed.
Configure Varnish To Use ESI
We tell Varnish to use ESI in our VCL, within a vcl_backend_response subroutine.
sub vcl_backend_response {
  set beresp.do_esi = true;
}
Note: in Varnish 3 you would put this inside sub vcl_fetch. See the other differences between Varnish 3 and 4 in these upgrading notes.
If you restart Varnish and reload your page you should find that the “Not ESI!” text has gone, and if you View Source there is no trace of the includes but the sidebar is being included. Our times should remain the same, however, as we are still caching both parts of the page in the same way.
Tweak The TTL
I want my sidebar to only be cached for 30 seconds before it is refreshed, and my main content 120 seconds. Inside the vcl_backend_response subroutine add the following:
if (bereq.url ~ "sidebar.php") {
  set beresp.ttl = 30s; } else {
  set beresp.ttl = 120s;
}
Here I am saying that if the URL matches the string sidebar.php cache only for 30 seconds, otherwise cache for 120 seconds.
Save the VCL and restart Varnish, then reload your page – both times should be the same. Wait 30 seconds and reload the page – the sidebar time should update but the main time remain the same. You are now caching these page components differently and assembling the page with ESI.

The value passed to bereq.url is a regular expression. Something you might like to do is put files that are uncachable or have a common TTL into one folder, then target that folder.
if (bereq.url ~ "^/inc") {
  set beresp.ttl = 30s; } else {
  set beresp.ttl = 120s;
}
There are some more examples of simple expressions on the Fastly regular expression cheat sheet.
Set Some Content To Never Cache
If there is an include that you never want to be cached (for example, if it contains some personalized content), you can selectively flag things as uncacheable and deliver them directly from the web server.
I have a folder named personalized and I want any includes inside that folder to be served from the web server directly, bypassing the cache. I can do this using a similar if statement to the one I used to set the TTL, again in vcl_backend_response.
if (bereq.url ~ "^/personalized") {
  set beresp.uncacheable = true;
  return(deliver);
}
The line return(deliver); means that the content bypasses the cache altogether and will always be served fresh, while the rest of the page gets served from the cache. You can test this by creating an include, again with a time on it, and placing it in the personalized folder.
<esi:include src="personalized/panel.php"/>
<esi:remove>
  <?php include('personalized/panel.php'); ?>
</esi:remove>
This content should always show an updated time as it is served from the cache.
The full VCL can be found on GitHub. You can try different combinations of ESI to meet your own caching requirements.
Other Resources
Edge Side Includes can be a powerful way to tweak the performance of Varnish. How you use them, though, is likely to be very specific to your own site. Hopefully this article has highlighted some of the possibilities. To finish, here are some links that I’ve looked at while writing this tutorial and some which detail implementation for various CMSs. Check carefully which version of Varnish the article refers to – there is a lot of Varnish 3 or even Varnish 2 information about and the syntax has changed significantly. However, converting from one to the other is generally straightforward.
- Using Edge Side Includes with Varnish to Cache Partial Pages
- Getting Started With Varnish Edge Side Includes and WordPress
- Drupal ESI Integration
- ESI and Caching Trickery in Varnish
Further Reading
- Speed Up Your Mobile Website With Varnish
- HTTPS Everywhere With Nginx, Varnish And Apache
- A Look At The Modern WordPress Server Stack
- Secrets Of High-Traffic WordPress Blogs


 Start with a free demo —
 Take a break with a 3D game built on Netlify!
 Check the frontend report!

