How To Improve Your Microcopy: UX Writing Tips For Non-UX Writers
Throughout my UX writing career, I’ve held many different roles: a UX writer in a team of UX writers, a solo UX writer replacing someone who left, the first and only UX writer at a company, and even a teacher at a UX writing course, where I reviewed more than 100 home assignments. And oh gosh, what I’ve seen.
Crafting microcopy is not everyone’s strong suit, and it doesn’t have to be. Still, if you’re a UX designer, product manager, analyst, or marketing content writer working in a small company, on an MVP, or on a new product, you might have to get by without a UX writer. So you have the extra workload of creating microcopy. Here are some basic rules that will help you create clear and concise copy and run a quick health check on your designs.
Ensure Your Interface Copy Is Role-playable
Why it’s important:
- To create a friendly, conversational experience;
- To work out a consistent interaction pattern.
When crafting microcopy, think of the interface as a dialog between your product and your user, where:
- Titles, body text, tooltips, and so on are your “phrases.”
- Button labels, input fields, toggles, menu items, and other elements that can be tapped or selected are the user’s “phrases.”
Ideally, you should be able to role-play your interface copy: a product asks the user to do something — the user does it; a product asks for information — the user types it in or selects an item from the menu; a product informs or warns the user about something — the user takes action.
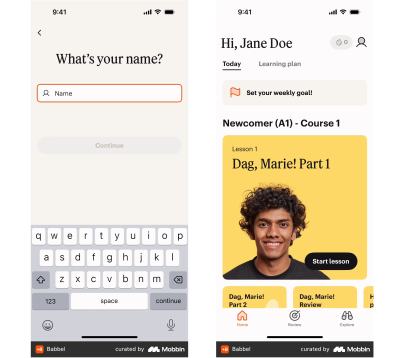
For example, if your screen is devoted to an event and the CTA is for the user to register, you should opt for a button label like “Save my spot” rather than “Save your spot.” This way, when a user clicks the button, it’s as if they are pronouncing the phrase themselves, which resonates with their thoughts and intentions.
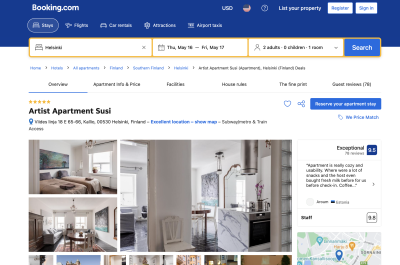

Be Especially Transparent And Clear When It Comes To Sensitive Topics
Why it’s important: To build trust and loyalty towards your product.
Some topics, such as personal data, health, or money, are extremely sensitive for people. If your product involves any limitations, peculiarities, or possible negative outcomes related to these sensitive topics, you should convey this information clearly and unequivocally. You will also need to collaborate with your UX/UI Designer closely to ensure you deliver this information in a timely manner and always make it visible without requiring the user to take additional actions (e.g., don’t hide it in tooltips that are only shown by tapping).
Here’s a case from my work experience. For quite some time, I’ve been checking homework assignments for a UX writing course. In this course, all the tasks have revolved around an imaginary app for dog owners. One of the tasks students worked on was creating a flow for booking a consultation with a dog trainer. The consultation had to be paid in advance. In fact, the money was blocked on the user’s bank card and charged three hours before the consultation. That way, a user could cancel the meeting for free no later than three hours before the start time. A majority of the students added this information as a tooltip on the checkout screen; if a user didn’t tap on it, they wouldn’t be warned about the possibility of losing money.
In a real-life situation, this would cause immense negativity from users: they may post about it on social media, and it will show the company in a bad light. Even if you occasionally resort to dark patterns, make sure you can afford any reputational risks.
So, when creating microcopy on sensitive topics:
- Be transparent and honest about all the processes and conditions. For example, you’re a fintech service working with other service providers. Because of that, you have fees built into transactions but don’t know the exact amount. Explain to users how the fees are calculated, their approximate range (if possible), and where users can see more precise info.
- Reassure users that you’ll be extremely careful with their data. Explain why you need their data, how you will use it, store and protect it from breaches, and so on.
- If some restrictions or limitations are implied, provide options to remove them (if possible).
Ensure That The Button Label Accurately Reflects What Happens Next
Why it’s important:
- To make your interface predictable, trustworthy, and reliable;
- To prevent user frustration.
The button label should reflect the specific action that occurs when the user clicks or taps it.
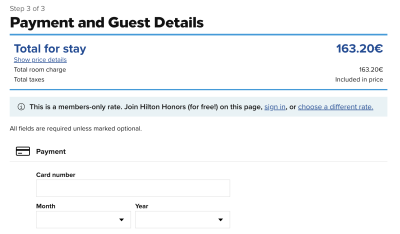
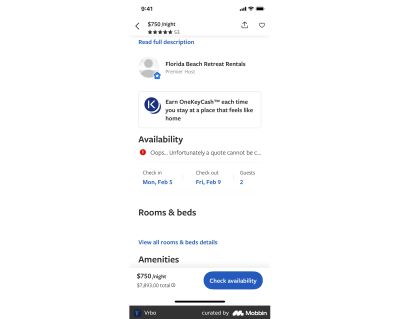
It might seem valid to use a button label that reflects the user’s goal or target action, even if it actually happens a bit later. For example, if your product allows users to book accommodations for vacations or business trips, you might consider using a “Book now” button in the booking flow. However, if tapping it leads the user to an order screen where they need to select a room, fill out personal details, and so on, the accommodation is not booked immediately. So you might want to opt for “Show rooms,” “Select a rate,” or another button label that better reflects what happens next.
Moreover, labels like “Buy now” or “Book now” might seem too pushy and even off-putting (especially when it comes to pricey products involving a long decision-making process), causing users to abandon your website or app in favor of ones with buttons that create the impression they can browse peacefully for as long as they need. You might want to let your users “Explore,” “Learn more,” “Book a call,” or “Start a free trial” first.
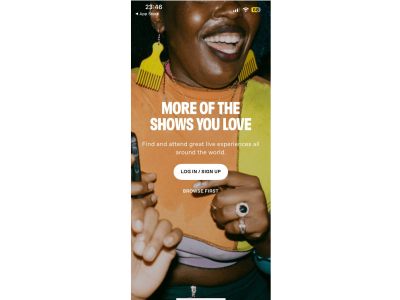
As a product manager or someone with a marketing background, you might want to create catchy and fancy button labels to boost conversion rates. For instance, when working on an investment app, you might label a button for opening a brokerage account as “Become an investor.” While this might appeal to users’ egos, it can also come across as pretentious and cheap. Additionally, after opening an account, users may still need to do many things to actually become investors, which can be frustrating. Opt for a straightforward “Open an account” button instead.
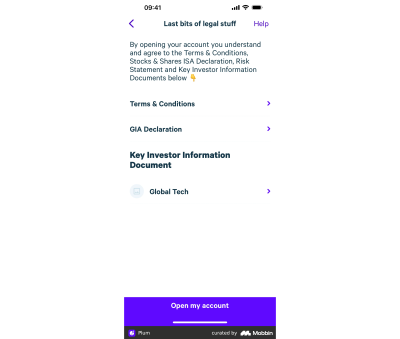
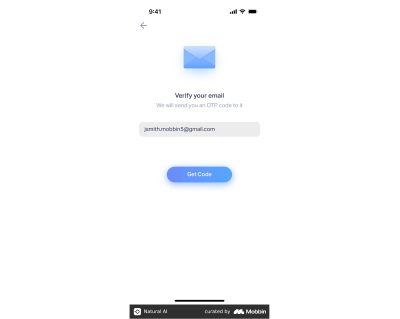
In this regard, it’s better not to promise users things that we can’t guarantee or that aren’t entirely up to us. For example, in a flow that includes an OTP password, it’s better to opt for the “Send a code” button rather than “Get a code” since we can’t guarantee there won’t be any network outages or other issues preventing the user from receiving an SMS or a push notification.
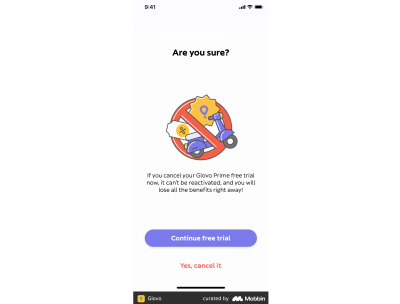
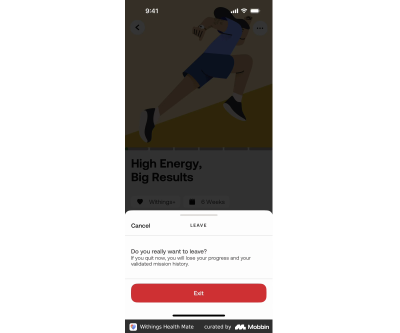
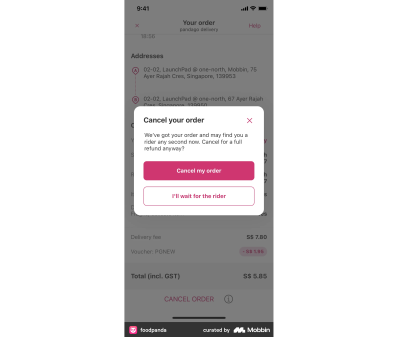
Finally, avoid using generic “Yes” or “No” buttons as they do not clearly reflect what happens next. Users might misread the text above or fail to notice a negation, leading to unexpected outcomes. For example, when asking for a confirmation, such as “Are you sure you want to quit?” you might want to go with button labels like “Quit” and “Stay” rather than just “Yes” and “No.”
Tip: If you have difficulty coming up with a button label, this may be a sign that the screen is poorly organized or the flow lacks logic and coherence. For example, a user has to deal with too many different entities and types of tasks on one screen, so the action can’t be summarized with just one verb. Or perhaps a subsequent flow has a lot of variations, making it hard to describe the action a user should take. In such cases, you might want to make changes to the screen (say, break it down into several screens) or the flow (say, add a qualifying question or attribute earlier so that the flow would be less branching).
Make It Clear To The User Why They Need To Perform The Action
Why it’s important:
- To create transparency and build trust;
- To boost conversion rates.
An ideal interface is self-explanatory and needs no microcopy. However, sometimes, we need to convince users to do something for us, especially when it involves providing personal information or interacting with third-party products.
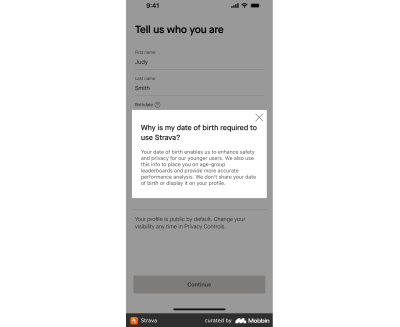
You can use the following formula: “To [get this], do [this] + UI element to make it happen.” For example, “To get your results, provide your email,” followed by an input field.
It’s better to provide the reasoning (“to get your results”) first and then the instructions (“provide your email” ): this way, the guidance is more likely to stick in the user’s memory, smoothly leading to the action. If you reverse the order — giving the instructions first and then the reasoning — the user might forget what they need to do and will have to reread the beginning of the sentence, leading to a less smooth and slightly hectic experience.
Ensure The UI Element Copy Doesn’t Explain How To Interact With This Very Element
Why it’s important:
- If you need to explain how to interact with a UI element, it may be a sign that the interface is not intuitive;
- Risk omitting or not including more important, useful text.
Every now and then, I come across meaningless placeholders or excessive toggle copy that explains how to interact with the field or toggle. The most frequent example is the “Search” placeholder for a search field. Occasionally, I see button labels like “Press to continue.”

Mobile and web interfaces have been around for quite a while, and users understand how to interact with buttons, toggles, and fields. Therefore, explanations such as “click,” “tap,” “enter,” and so on seem excessive in most cases. Perhaps it’s only with a group of checkboxes that you might add something like “Select up to 5.”
You might want to add something more useful. For example, instead of a generic “Search” placeholder for a search field, use specific instances a user might type in. If you’re a fashion marketplace, try placeholders like “oversized hoodies,” “women’s shorts,” and so on. Keep in mind the specifics of your website or app: ensure the placeholder is neither too broad nor too specific, and if a user types something like you’ve provided, their search will be successful.

Stick To The Rule “1 Microcopy Item = 1 Idea”
Why it’s important:
- Not to create extra cognitive load, confusion, or friction;
- To ensure a smooth and simple experience.
Users have short attention spans, scan text instead of reading it thoroughly, and can’t process multiple ideas simultaneously. That’s why it’s crucial to break information down into easily digestible chunks instead of, for example, trying to squeeze all the restrictions into one tooltip.
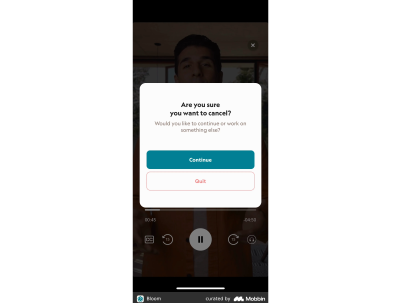
The golden rule is to provide users only with the information they need at this particular stage to take a specific action or make a decision.
You’ll need to collaborate closely with your designer to ensure the information is distributed over the screen evenly and you don’t overload one design element with a lot of text.
Be Careful With Titles Like “Done,” “Almost There,” “Attention,” And So On
Why it’s important:
- Not to annoy a user;
- To be more straightforward and economical with users’ time;
- Not to overuse their attention;
- Not to provoke anxiety.
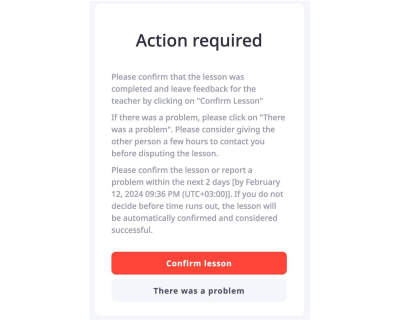
Titles, written in bold and larger font sizes, grab users’ attention. Sometimes, titles are the only text users actually read. Titles stick better in their memory, so they must be understandable as a standalone text.
Titles like “One more thing” or “Almost there” might work well if they align with a product’s tone of voice and the flows where they appear are cohesive and can hardly be interrupted. But keep in mind that users might get distracted.
Use this quick check: set your design aside for about 20 minutes, do something else, and then open only the screen for which you’re writing a title. Is what happens on this screen still understandable from the title? Do you easily recall what has or hasn’t happened, what you were doing, and what should be done next?
Don’t Fall Back On Abstract Examples
Why it’s important:
- To make the interface more precise and useful;
- To ease the navigation through the product for a user;
- To reduce cognitive load.
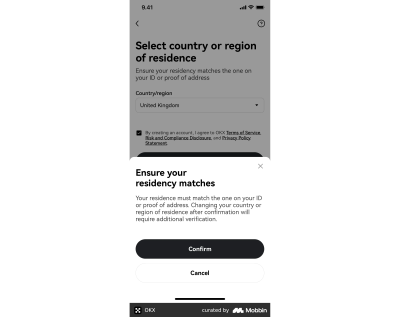
Some products (e.g., any B2B or financial ones) involve many rules and restrictions that must be explained to the user. To make this more understandable, use real-life examples (with specific numbers, dates, and so on) rather than distilling abstract information into a hint, tooltip, or bottom sheet.
It’s better to provide explanations using real-life examples that users can relate to. Check with engineers if it’s possible to get specific data for each user and add variables and conditions to show every user the most relevant microcopy. For example, instead of saying, “Your deposit limit is $1,000 per calendar month,” you could say, “Until Jan 31, you can deposit $400 more.” This relieves the user of unnecessary work, such as figuring out the start date of the calendar month in their case and calculating the remaining amount.
Try To Avoid Negatives
Why it’s important:
- Not to increase cognitive load;
- To prevent friction.
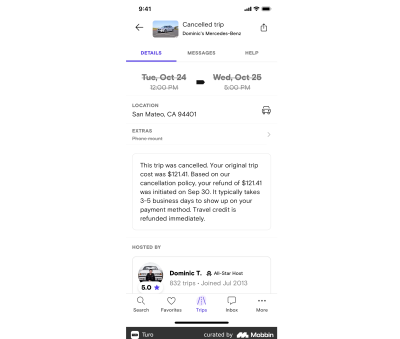
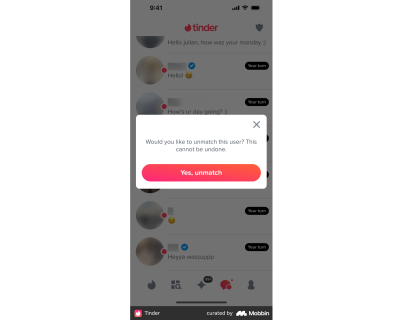
As a rule of thumb, it’s recommended to avoid double negatives, such as “Do not unfollow.” However, I’d go further and advise avoiding single negatives as well. The issue is that to decipher such a message, a user has to perform an excessive logical operation: first eliminating the negation, then trying to understand the gist.
For example, when listing requirements for a username, saying “Don’t use special characters, spaces, or symbols” forces a user to speculate (“If this is not allowed, then the opposite is allowed, which must be…”). It can take additional time to figure out what falls under “special characters.” To simplify the task for the user, opt for something like “Use only numbers and letters.”
Moreover, a user can easily overlook the “not” part and misread the message.
Another aspect worth noting is that negation often seems like a restriction or prohibition, which nobody likes. In some cases, especially in finance, all those *don’t*s might be perceived with suspicion rather than as precaution.
Express Action With Verbs, Not Nouns
Why it’s important:
- To avoid wordiness;
- To make text easily digestible.
When describing an action, use a verb, not a noun. Nouns that convey the meaning of verbs make texts harder to read and give off a legalistic vibe.
Here are some sure signs you need to paraphrase your text for brevity and simplicity:
- Forms of “be” as the main verbs;
- Noun phrases with “make” (e.g., “make a payment/purchase/deposit”);
- Nouns ending in -tion, -sion, -ment, -ance, -ency (e.g., cancellation);
- Phrases with “of” (e.g., provision of services);
- Phrases with “process” (e.g., withdrawal process).
Make Sure You Use Only One Term For Each Entity
Why it’s important: Not to create extra cognitive load, confusion, and anxiety.
Ensure you use the same term for the same object or action throughout the entire app. For example, instead of using “account” and “profile” interchangeably, choose one and stick to it to avoid confusing your users.
The more complicated and/or regulated your product is, the more vital it is to choose precise wording and ensure it aligns with legal terms, the wording users see in the help center, and communication with support agents.
Less “Oopsies” In Error Messages
Why it’s important:
- Not to annoy a user;
- To save space for more important information.
At first glance, “Oops” may seem sweet and informal (yet with an apologetic touch) and might be expected to decrease tension. However, in the case of repetitive or serious errors, the effect will be quite the opposite.
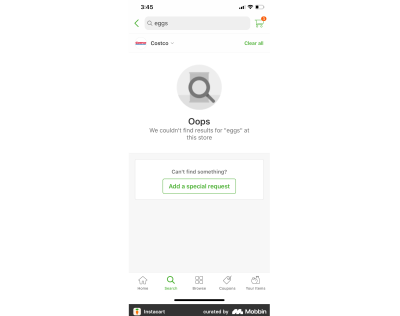
Use “Oops” and similar words only if you’re sure it suits your brand’s tone of voice and you can finesse it.
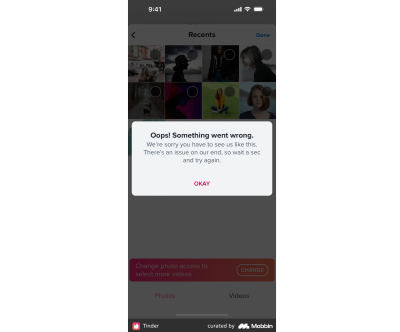
As a rule of thumb, good error messages explain what has happened or is happening, why (if we know the reason), and what the user should do. Additionally, include any sensitive information related to the process or flow where the error appears. For example, if an error occurs during the payment process, provide users with information concerning their money.
No Excessive Politeness
Why it’s important: Not to waste precious space on less critical information.
I’m not suggesting we remove every single “please” from the microcopy. However, when it comes to interfaces, our priority is to convey meaning clearly and concisely and explain to users what to do next and why. Often, if you start your microcopy with “please,” you won’t have enough space to convey the essence of your message. Users will appreciate clear guidelines to perform the desired action more than a polite message they struggle to follow.
Remove Tech Jargon
Why it’s important:
- To make the interface understandable for a broad audience;
- To avoid confusion and ensure a frictionless experience.
As tech specialists, we’re often subject to the curse of knowledge, and despite our efforts to prioritize users, tech jargon can sneak into our interface copy. Especially if our product targets a wider audience, users may not be tech-savvy enough to understand terms like “icon.”
To ensure your interface doesn’t overwhelm users with professional jargon, a quick and effective method is to show the interface to individuals outside your product group. If that’s not feasible, here’s how to identify jargon: it’s the terminology you use in daily meetings among yourselves or in Jira task titles (e.g., authorization, authentication, and so on), or abbreviations (e.g., OTP code, KYC process, AML rules, and so on).
Ensure That Empty State Messages Don’t Leave Users Frustrated
Why it’s important:
- For onboarding and navigation;
- To increase discoverability of particular features;
- To promote or boost the use of the product;
- To reduce cognitive load and anxiety about the next steps.
Quite often, a good empty state message is a self-destructing one, i.e. one that helps a user to get rid of this emptiness. An empty state message shouldn’t just state “there’s nothing here” — that’s obvious and therefore unnecessary. Instead, it should provide users with a way out, smoothly guiding them into using the product or a specific feature. A well-crafted empty message can even boost conversions.
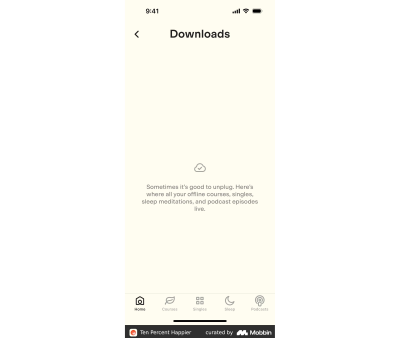
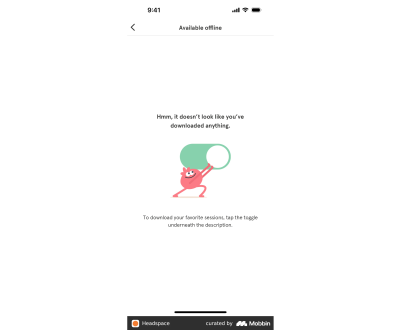
Of course, there are exceptions, for example, in a reactive interface like a CRM system for a restaurant displaying the status of orders to workers. If there are no orders in progress and, therefore, no corresponding empty state message, you can’t nudge or motivate restaurant workers to create new orders themselves.
Place All Important Information At The Beginning
Why it’s important:
- To keep the user focused;
- Not to overload a user with info;
- Avoid information loss due to fading or cropping.
As mentioned earlier, users have short attention spans and often don’t want to focus on the texts they read, especially microcopy. Therefore, ensure you place all necessary information at the beginning of your text. Omit lead-ins, introductory words, and so on. Save less vital details for later in the text.
Ensure Title And Buttons Are Understandable Without Body Text
Why it’s important:
- For clarity;
- To overcome the serial position effect;
- To make sure the interface, the flow, and the next steps are understandable for a user even if they scan the text instead of reading.
There’s a phenomenon called the serial position effect: people tend to remember information better if it’s at the beginning or end of a text or sentence, often overlooking the middle part. When it comes to UX/UI design, this effect is reinforced by the visual hierarchy, which includes the bigger font size of the title and the accentuated buttons. What’s more, the body text is often longer, which puts it at risk of being missed. Since users tend to scan rather than read, ensure your title and buttons make sense even without the body text.
Wrapping up
Trying to find the balance between providing a user with all the necessary explanations, warnings, and reasonings on one hand and keeping the UI intuitive and frictionless on the other hand is a tricky task.
You can facilitate the process of creating microcopy with the help of ChatGPT and AI-based Figma plugins such as Writer or Grammarly. But beware of the limitations these tools have as of now.
For instance, creating a prompt that includes all the necessary details and contexts can take longer than actually writing a title or a label on your own. Grammarly is a nice tool to check the text for typos and mistakes, but when it comes to microcopy, its suggestions might be a bit inaccurate or confusing: you might want to, say, omit articles for brevity or use elliptical sentences, and Grammarly will identify it as a mistake.
You’ll still need a human eye to evaluate the microcopy &mdahs; and I hope this checklist will come in handy.
Microcopy Checklist
General
✅ Microcopy is role-playable (titles, body text, tooltips, etc., are your “phrases”; button labels, input fields, toggles, menu items, etc. are the user’s “phrases”).
Information presentation & structure
✅ The user has the exact amount of information they need right now to perform an action — not less, not more.
✅ Important information is placed at the beginning of the text.
✅ It’s clear to the user why they need to perform the action.
✅ Everything related to sensitive topics is always visible and static and doesn’t require actions from a user (e.g., not hidden in tooltips).
✅ You provide a user with specific information rather than generic examples.
✅ 1 microcopy item = 1 idea.
✅ 1 entity = 1 term.
✅ Empty state messages provide users with guidelines on what to do (when possible and appropriate).
Style
✅ No tech jargon.
✅ No excessive politeness, esp. at the expense of meaning.
✅ Avoid or reduce the use of “not,” “un-,” and other negatives.
✅ Actions are expressed with verbs, not nouns.
Syntax
✅ UI element copy doesn’t explain how to interact with this very element.
✅ Button label accurately reflects what happens next.
✅ Fewer titles like “done,” “almost there,” and “attention.”
✅ “Oopsies” in error messages are not frequent and align well with the brand’s tone of voice.
✅ Title and buttons are understandable without body text.


 Register for free to attend Axe-con
 Celebrating 10 million developers
 SurveyJS: White-Label Survey Solution for Your JS App


